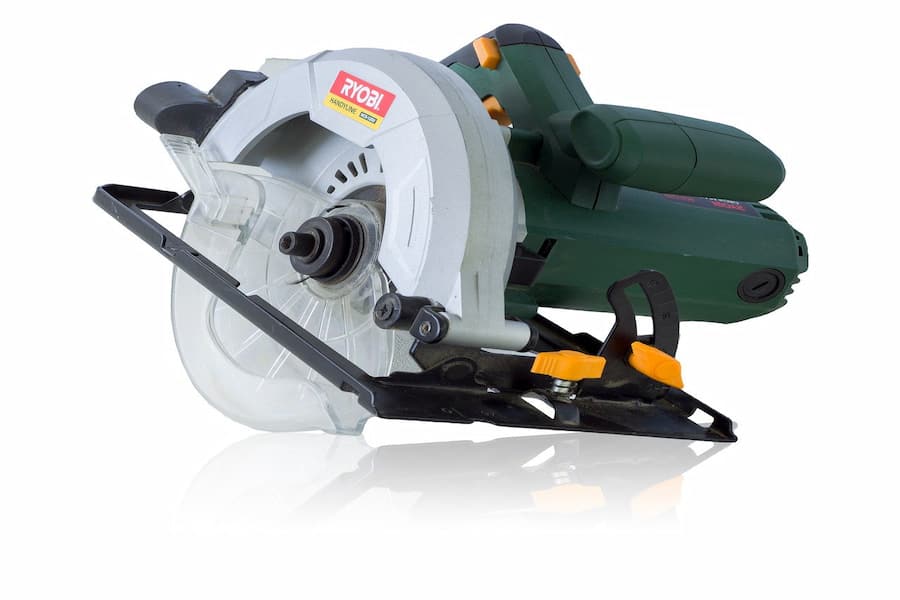
A circular saw is a very popular tool used for cutting wood and also other materials. You may need to cut wood at different angles to build durable structures or aesthetically pleasing ones. In this article, you will see how to cut a 45-degree angle with a circular saw.
Contents
How to Make a 45 Degree Angle With a Circular Saw
45-degree angle cuts are commonly used and in this article, I outline how to do this cut with your circular saw.

Tools Required
- Circular saw
- Safety gear, including glasses, gloves, and ear-guards
- A table or suitable workstation
- Pencil or marker for marking
- Measuring tape
- Clamps
- 45-degree angle guide
- Sandpaper
- Framing square / angle square / speed square / protractor
Safety Measures
- The circular saw should be in proper working condition. All moving parts must be firmly attached, and there should be no exposed electric wires.
- Ensure you are wearing proper safety gear, including a helmet, a pair of gloves, and earmuffs.
- The sharpness of the blades should be tested by making some sample cuts. There shouldn’t be any electric cables in the work area.
- All loose clothing, jewelry, and any material that might get stuck in the blade should be properly tied back.
- The circular saw should have enough space to move freely between the open and closed positions. Stand in a position so that you can avoid any kind of kick-back.
- Make sure to begin cutting only after reaching a stable position. Do not leave the saw till the blades have stopped moving after you have started cutting.
- Keep children away from the work zone to avoid any injuries due to casualness.
The above safety measures must be observed for carrying on the process safely.
Step #1: Mark Your Cut
One of the keys to accurately cutting 45 degree miters is properly marking the angle on your workpiece.
- Use a combination square, speed square, or protractor to draw 45 degree cutting lines.
- Place the square flush against the board edge, align it to the 45 or 135 degree mark, then run a pencil along the edge.
- Mark lines on both horizontal and vertical faces to create complete miters.
- Take care to set the square precisely at the angle measure marks.
Properly marking your cut lines will result in tighter joint fits and precise angles.
Step #2: Choose the Correct Blade
The first step in making any cuts using a circular saw involves choosing the correct blade.
- Framing or construction blades with 24-40 teeth are fast for rough work, but leave splintered edges on miters.
- Use 60-80 tooth finishing blades for smooth, precise compound miter cuts on trim and boards. Alternate top bevel blade designs help control tear out.
- For fine finishes, use a plywood blade with over 100 teeth or a dedicated miter saw blade.
Make sure the blades are carbon-tipped and ensure you know the SFM of the blade. SFM is the speed at which the blade is moving.
The optimum number of teeth on the blade varies according to the blade size, speed of rotation, and application. Some common configurations are:
- 10-inch diameter, 60 and 80 teeth
- 12-inch diameter, 60, 80, and 100 teeth
- 14-inch diameter, 60,80 and 100 teeth
With the proper tooth configuration and gullet design, you can achieve sharp corners and minimal chip out when cutting 45s with a circular saw.
Know more about the structure of a circular saw.
Step #3: Set the Depth
Ensure the circular saw is disconnected from the power supply and begin to set the blade’s cutting depth.
Adjust the saw blade to make it reach about a quarter of an inch below the bottom of the wood. The saw should be fixed to the wooden board.
Use the adjusting knob to access the lever and tighten the circular saw upon reaching the desired depth.

Step #4: Set the Saw Guide
The next step is to ensure the angle guide is precisely set.
Place the saw guide firmly and accurately position the 45-degree angle guide. Use clamps to ensure the guide stays in position throughout the process.
After clamping, use the alignment knob of the saw to check if the alignments are done perfectly. Re-align until a perfect 45-degree angle is obtained.
Step #5: Hold the Saw Properly
Most of the errors during cutting occur due to concentration lapses. Hold the saw in a manner such that the guidelines are visible.
Periodically check if the saw guide alignment is in position and the blade is as desired. Do not leave the saw before the blade stops rotating completely to avoid rough cuts.
The edge of the base of the circular saw and the cutting square must be assigned. Then carefully slide the speed square up the base plates.
Ensure that both the speed square and the saw plate are in a proper stable position while cutting the wood.
Step #6: Begin to Cut
The 45-degree cuts are the most common type of miter cuts to the extent that it is almost synonymous with them.
There are two kinds of miter cuts:
- Flat Miters
- Case Miters
How to Cut Case Miters
These cuts are generally used to join two pieces of wood that are already cut at an angle. Begin with the following steps only after putting on your safety gear.
- Clamp the wooden piece to the workstation. Ensure the piece falls on the floor when cut. The cut line should be about 3 inches away from the clamped point.
- Ensure that the saw guide is in position. Position the framing square’s 90-degree leg parallel to the line along which you want to cut.
- Use the adjustment screw, or pressure clamp of the circular saw at the bottom to lock the cutting angle at 45 degrees. Unplug the saw before beginning to adjust.
- After the saw’s shoe is aligned, place the bottom plate of the blade against the square and begin to cut along its edge.
How to Cut Flat Miters
These kinds of cuts are used when strong joints are required. Proper safety gear should be worn for this process as well.
- Hold the rafter angle square as a guide against the board you want to cut. Its 45-degree side should be parallel to the guideline.
- Align the shoe of the saw with the guideline and after placing the blade against the rafter angle square, begin to cut in the upward direction.
- Ensure your fingers are away from the blade during the entire cutting process.
Step #7: Smoothen the Cut
Despite all the precautions taken and even after multiple readjustments, the cut edges may still have an undesired rough texture.
The roughness needs to be smoothened using your sandpaper. To begin with, use coarse-grit sandpaper to get a relatively smoother texture.
After this process, begin to use the fine-grit sandpaper. Depending on the kind of finishing needed, be careful to choose the grit of the sandpaper.
Safety Considerations
When cutting angled miters with a circular saw, safety should always be the top priority.
- Be sure to wear proper PPE like eye protection, hearing protection, and a dust mask.
- Keep your work area clean and clear of debris.
- Secure your workpiece with clamps to prevent movement and kickback.
- Allow the blade to reach full speed before starting the cut.
- Keep your circular saw unplugged when adjusting the bevel angle.
- Maintain awareness of where your body parts are in relation to the blade path.
Taking basic safety precautions will help mitigate risks when performing miter cuts at 45 degrees.
Frequently Asked Questions
Why Are 45-Degree Cuts So Popular?
Wood is cut primarily for two reasons, to build durable structures and to make them aesthetically pleasing. Geometrically, 45-degree cuts produce the strongest structures, and with proper finishing, they look beautiful as well.
Can a 45-Degree Angle Be Cut Without a Miter Saw?
It is possible to cut a 45-degree angle without a miter saw, but the process becomes very tedious. You have to be very careful while making all the markings and be extra careful about the placement of the saw guides.

Conclusion
A 45-degree cut is often used on wood, and the most conducive tool for the process is a circular saw. Make sure you have a proper functional circular saw and make practice cuts before starting the process. In due course, you will be able to master miter cuts.
