Considering sanding down concrete as a DIY project? Don’t worry, I got you covered. In this article, I’ll teach you how concrete sanding works and all the information you need so you can do it on your own.
Contents
How to Sand Concrete
Concrete is usable in various applications, and the most significant application is flooring. Concrete is now being used for outdoor fixtures, basements, counters, garages, and others. It is because they are durable and can be appealing, as per the work execution.
Among all the procedures, sanding is one practical aspect that is inevitable. There are a few ways using which you can sand the concrete projects at ease.
How to Sand Concrete
In order to ensure that you are proficient in sanding concrete, it is important to possess the right skill. In fact, it is no rocket science and demands no expertise. But, it does require a rightful approach and skillful execution.

Concrete floors are quite easy to maintain and clean, but you need to prepare them before worrying about maintenance. Therefore, if you possess the right tools, then this guide will certainly help you to learn how to sand concrete all by yourself!
Equipment Needed for Sanding Concrete
For this DIY project, you also need to practice safety. Here is some useful equipment that you might need when you’re working on sanded concrete and even wet sanding.
- Safety goggles
- Gloves
- Dust mask (for dry sanding)
- Ear protection
- Liquid chemical hardener
- An angle grinder, concrete grinder, or concrete polisher
- Diamond cup grinder wheel (to remove the most material)
- Diamond pads (used for light sanding and polishing)
- Diamond hand sanding pads (used for reaching corners)
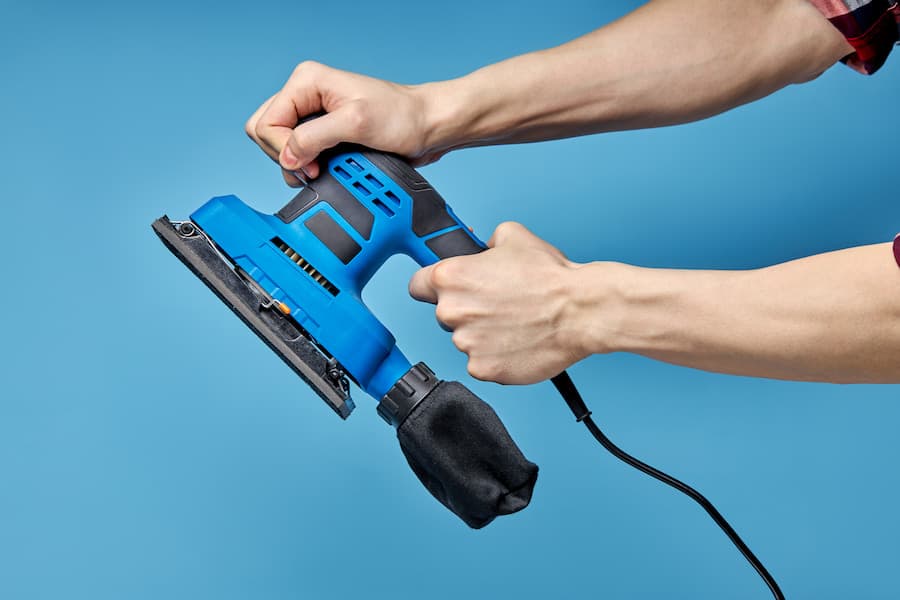
Method 1: Sanding Manually With Hand
- Check on the concrete area that you have to polish.
- If the polishing area is small, then using a manual approach is convenient.
- You will need diamond sanding pads or usual sandpapers. Also, you can use 30-60 grit sandpaper for the said purpose.
- Use your hands to give smooth and even strokes on the surface.
- Continue the rubbing process on the target area until you get the desired finish.
Pro Tip!
If you intend to use sandpaper for sanding a large concrete surface, it is better to approach it in sections. It will make the job easier for you!
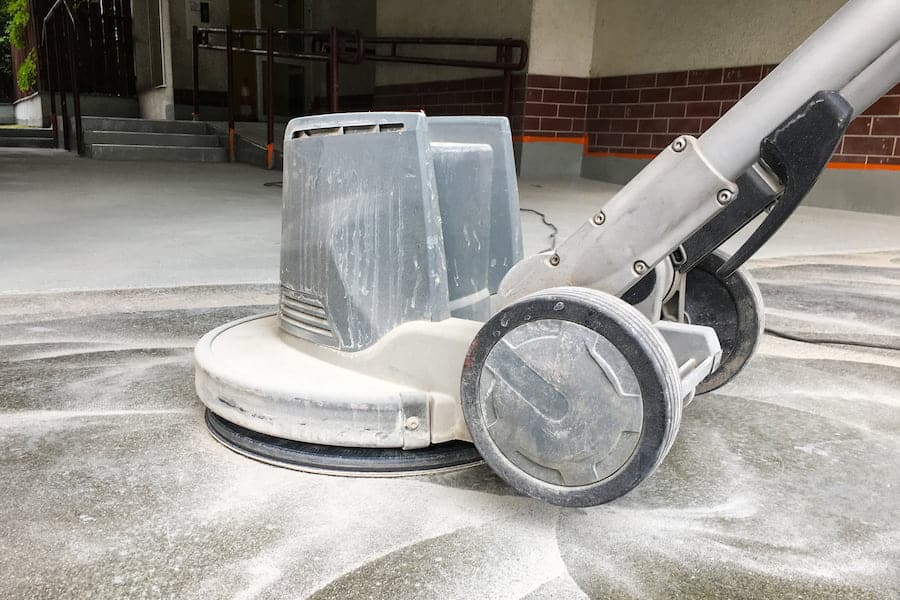
Method 2: Sanding With Orbital Sander or Power Tools
If the sanding area is big, then the manual approach might consume time and effort. For such scenarios, it is evident to make use of power tools such as a sander. In fact, it will help you minimize the sanding effort, and the work will be over in less time. The steps for the same are:
Step 1: Arrange All the Materials
- Buy or rent a sander tool, or instead, you can use a floor grinder for the purpose.
- Get the right diamond sanding pads for the tool.
- Keep a mop and water bucket alongside you while sanding the concrete floor.
- A vacuum cleaner will help clear the after-effects of sanding.
- Get a concrete sealant or epoxy resin, as per your choice.
Step 2: Prepare the Concrete Surface for Sanding
- A thorough cleaning is essential for the concrete surface before commencing the sanding process.
- Now clean the surface with the use of a vacuum cleaner and follow it up with mopping.
- Wet the concrete surface, and eradicate the excessive dampness to clear the dirt over the floor surface.
- For concrete countertops, sweeping and vacuuming is sufficient.
- Now, make use of a concrete cleaner to get rid of any texture issues.
- Cover all the surrounding objects that you want to protect from concrete dust.
Step 3: Fix the Holes Within Your Concrete Surface
Patch up all the holes within your concrete surface. Also, do not worry about overflowing those holes with more concrete, as you can sand it down in the next process.
Step 4: The Sanding Process
- Plug the power tool or sander into the power outlet.
- Ensure that the cable is long enough to let you drag the grinder around the surface seamlessly.
- Keep a firm grip over the handle, and run the sander or grinder over the concrete surface.
- You will see how fast the surface grinds and smoothens up in comparison to sandpapers.
- Hold the grinder for a bit more time on the overfilled hole patches to bring them to level.
- Continue the process until you get the smoothness and achieve your desired outcome.
Step 5: The Finishing Process
- After the sanding is over, rinse the surface with water. It will clear out the dust and dirt over the uneven spots.
- Leave the concrete floor to dry. It might take around two days for complete drying.
- Now, you can proceed with the application of the sealants, as per your choice. The epoxy resins are ideal picks for this purpose.
- Apply the coat of epoxy resin sealant to the concrete surface, and let it dry for around three days straight.
Here is a complete video demonstration of using a sander tool for sanding the concrete floors.
Reasons You Should Sand Concrete
There are various reasons why you should sand your concrete and they are essential. Below are the main reasons why you should sand concrete.
Improve Aesthetics
Concrete floors without sanding look ugly and rough. You have to sand concrete to get one of the popular finishes for concrete. A sanded concrete is much better compared to an unsanded one.
Sanding or polishing concrete floors is especially important for areas that have to look neat like the kitchen, walls, and even furniture. Polish concrete looks much better than rough concrete.
Smoothing Out Sharp Edges and Protruding Aggregate
No matter how much care you put into pouring concrete and smoothing out the corners, it would still have some sharp edges and protruding aggregates. Removing sharp edges and protruding aggregate is important as it could cause injuries and accidents.
The irregularities and exposed aggregate finish on your concrete could also damage your furniture and other stuff you move on the floor. Hence, it’s essential to sand concrete to avoid such hazards.
It also improves the overall look of the concrete as related to the first reason of aesthetics. You don’t want your guests looking at irregularities on your concrete or they won’t visit you ever again.
Remove Paint or Stains
Some paint or stains are very hard to remove. If cleaning products and paint strippers can’t help you remove unwanted paint or stains, your best option would be concrete sanding.
Sanding concrete floors completely removes the entire surface or layer and that means it also removes paint and stains. Sanding concrete floors removes everything on concrete surfaces allowing you to redo your paint job for a smooth finish.
Repairing the Concrete
Concrete will crack with time. Hence, you will need to repair it every once in a while. Most of the time, people just use concrete fillers. You want a smooth finish for a consistent look.
Do note that the concrete filler might have a different color than the concrete. People apply stains after sanding concrete to even out the colors.
Some people don’t like to apply concrete fillers and would often just replace large concrete surfaces with new ones. This process is expensive though and I don’t recommend it.
Common Concrete Finishes at Home
There are famous and standard finishes that people often follow at home for their concrete design. I’ll discuss each of them and their differences.
Smooth Finish
The most effortless finish to do. You can sand concrete by hand if you want this finish or use an orbital polisher. If you sand concrete by hand, it allows you to have better control over how smooth the finish will be.
This finish does not remove concrete by hand. The sanding concrete just polishes the top layer so it becomes smoother and shinier. It is popular for those who want a minimalistic and simple design.
Salt and Pepper Finish
This finish is a bit hard to do and involves a small amount of the top layer being sanded off. This causes the sand underlying the top layer to get exposed without showing any aggregate.
This finish is often used to get an aged look and to maximize the surrounding natural and artificial light. This finish is popular in commercial and industrial applications.
Medium Aggregate Finish
This finish is also called a semi-polished concrete finish. The concrete is thoroughly cleaned and heavily grounded to expose the medium aggregate in the concrete.
This finish is known for its high durability and unique appearance. They’re mostly used in new pours and renovations. Because more aggregate is exposed, the cost and time to do this finish are higher compared to other finishes.
Large Aggregate Finish
This finish is similar to a medium aggregate finish. However, the large aggregate in the exposed concrete floors produces an exquisite, almost terrazzo-like look. This finish is popular among luxury commercial and residential homes.
This finish is mostly used in new pours or renovations and is highly durable. It is regarded as the best-looking finish and is known for its high-glossing polishing.
It does come with the highest cost and installing it will take a while.
Frequently Asked Questions
What Are the Things That I Should Consider While Grinding or Sanding My Concrete Floor?
Also, you need to understand and learn some tips on the right preparation techniques for ideal outcomes.
Why Is It Important to Pick the Right Diamond Sand Bars or Sandpapers?
So, make sure you pick the right one, ranging between 30 to 60 grit, for your concrete polishing application.
Conclusion
If you intend to save money and do not want to hire professionals for your concrete sanding project, this article is the go-to guide to provide you with the right knowledge. Smoothening and polishing the concrete floor is not a difficult task.
However, you need to approach the application with ideal skills to ensure that the outcome doesn’t lead you to more hassles. Therefore, get the right tools and learn the correct techniques to get the job done.